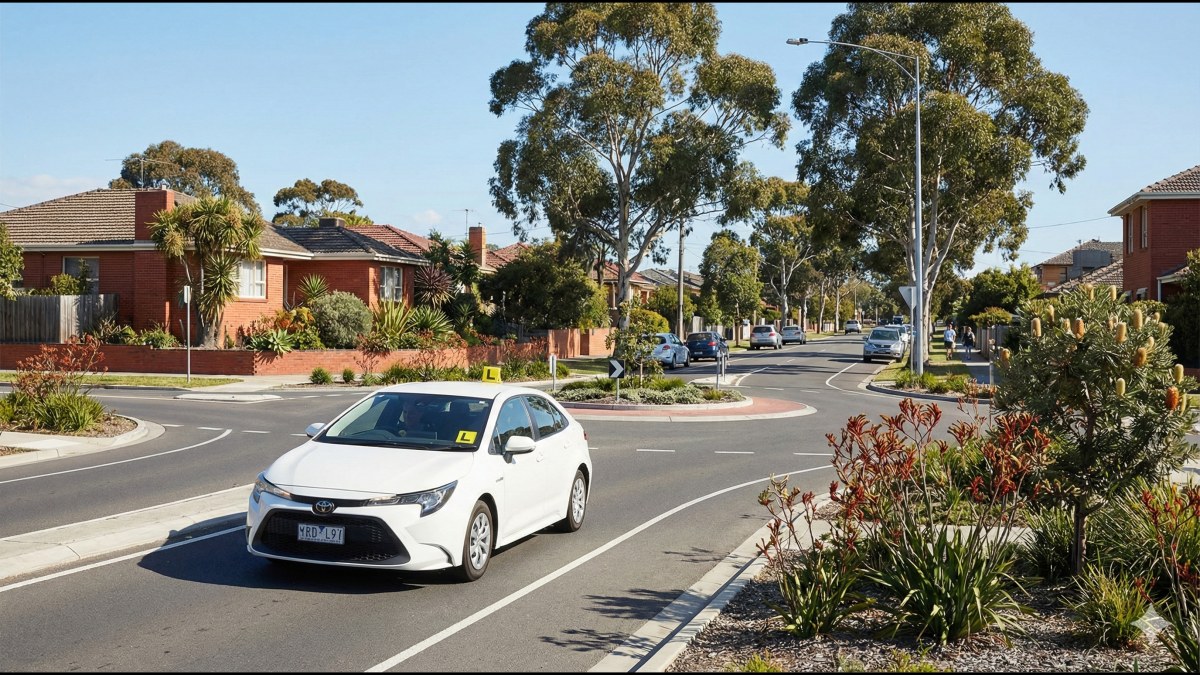
Victoria's drive test pass rate is 72.2%. That comes from 492,504 tests between January 2024 and April 2026, released to us by the Department of Transport and Planning under Freedom of Information. The test takes 30 to 40 minutes, split into two stages: low-speed residential streets first, then busier main roads. One critical error or too many minor faults ends it, and being stopped part-way is by far the most common way people come away without a licence: 22.1% of all tests are halted before they finish, against 5.7% that run to the end and fall short. Here's what to expect and how to prepare.
Testing Vehicle Requirements
To ensure a smooth test experience, your vehicle must meet certain conditions:
-
Clean, properly registered, and roadworthy
-
Functional speedometer visible from the passenger seat
-
Working driver and passenger side mirrors
-
Operational windscreen and rear window demisters
-
Seatbelts for all occupants
-
Comfortable temperature control
-
L plates displayed (for local learners)
-
Working headlights
-
Accessible handbrake for the testing officer
-
Functional doors
-
Manual transmission for manual license test
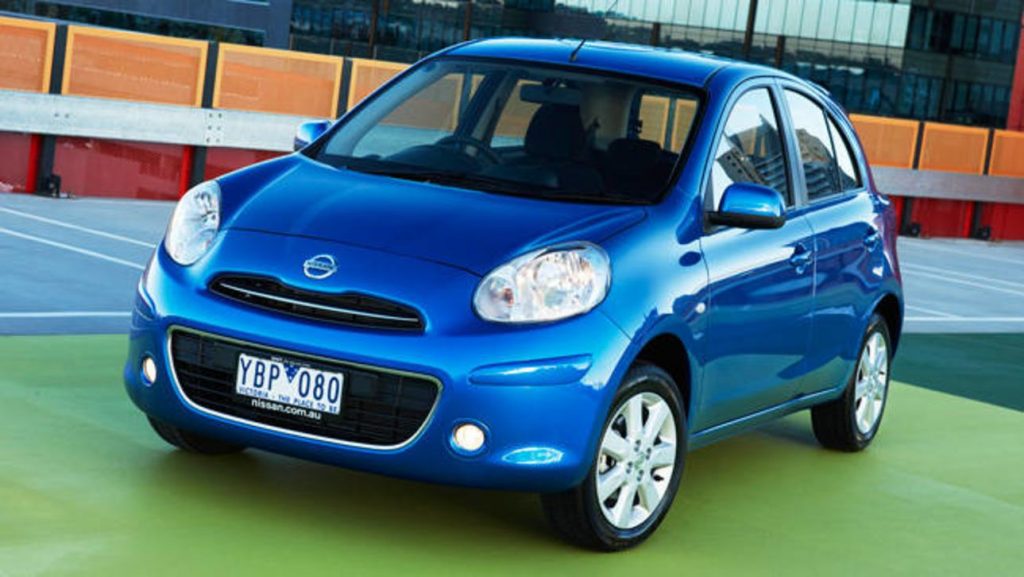
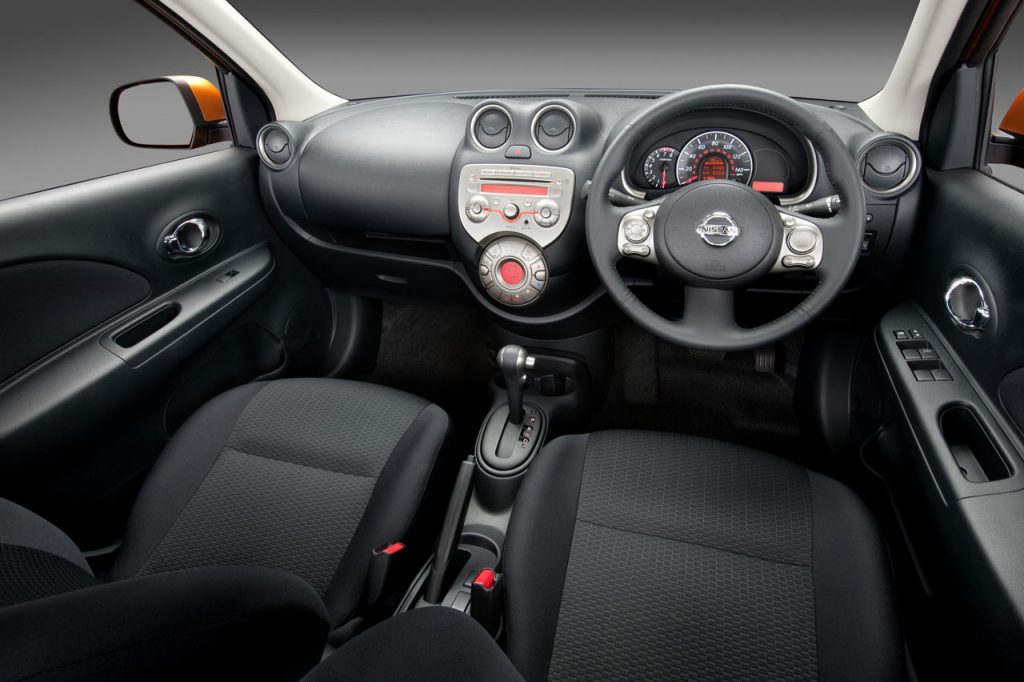
Compact cars like the Nissan Micra or BMW Mini are popular choices as they meet the above criteria and have large, easily visible speedometers. Their small size makes maneuvering, like 3-point turns, a breeze. Just be mindful of less power on inclines.
Testing Process
Beginning & End
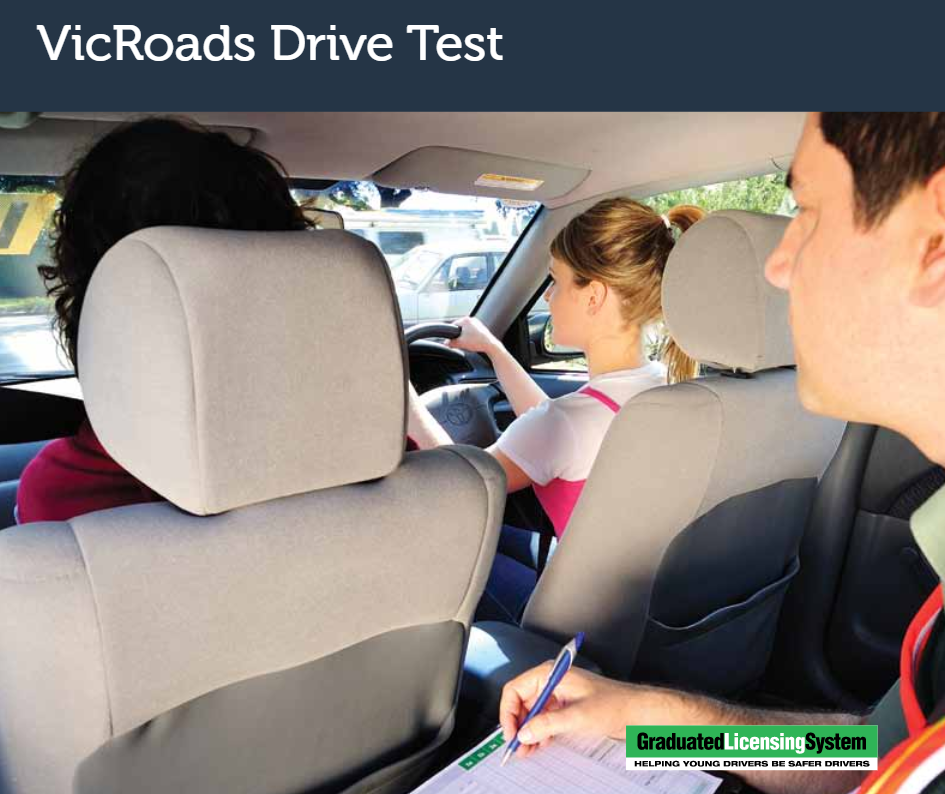
Your test will start and end at designated "License Testing" parking spots at the VicRoads office. Arrive early, reverse park, and head inside to check-in. Your testing officer will verify your details and inspect your vehicle.
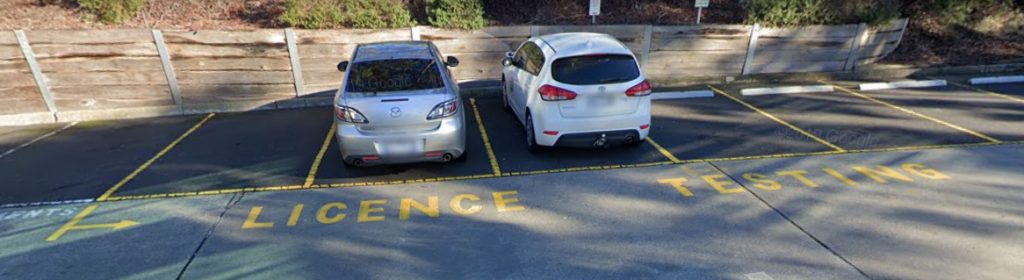
Return to your car, get comfortable, put on your seatbelt, adjust mirrors, start the engine, and wait for instructions. You don't need to reverse park at the end, just pull into any open spot.
Pre-Driving Checks
The officer will run through a checklist before you start driving:
- Turn on low beams (keep on for test)
- Turn high beams on, then off
- Activate left/right signals & hazards
- Test front and rear window washers/wipers
- Sound the horn
- Locate the handbrake & demisters
- Confirm you're comfortable
Always do a head check when starting from a stopped position. Stick to the posted speed limits in the VicRoads lot, usually 10km/h unless signed.
I am waiting for the instructions.
The test has two stages over 30-40 minutes:
- Low-risk tasks in quieter traffic
- Daily driving skills in busier traffic
Passing Stage 1 is required to attempt Stage 2. This keeps unsafe drivers from facing risky situations.
Want to get familiar with the test routes in advance? Check out AuDrive's real test route maps for your VicRoads location. You can easily create a practice route to master those roads before test day.
Stage 1 - Low Traffic
Stage 1 tests basic skills, usually in 50 km/h residential areas.
Body Position
Keep both hands on the steering wheel at all times during the test. Driving with one hand can be perceived as dangerous by the testing officer and will be marked strictly. If you don't hear an instruction clearly, politely ask the officer to repeat it. Avoid initiating unnecessary conversation with the testing officer.
Observations
Continuously scanning the road ahead and using mirrors and head (shoulder) checks is essential for safe driving. For a detailed breakdown of when and how to perform every head check, see our head check and mirror technique guide. Whenever you stop, start, turn, diverge, merge, or change lanes, you must check your mirrors and blind spots to maintain full awareness of your surroundings.
Intersections require special attention. Look both ways for potential hazards, even if you have right-of-way. Make it obvious to your tester that you're actively checking for pedestrians, bikes and other vehicles.
Most importantly, always keep your eyes on the road. While you will need to occasionally glance at your speedometer and mirrors, your primary focus should remain on the road ahead. Avoid staring at your dashboard or non-traffic areas for more than a brief moment.
Right of Way
Knowing who gives way is key to make you safe.
VicRoads Official Video about giving way at intersections.
Some important rules:
- At intersections with stop or give way signs, give way to all traffic on the intersecting road.
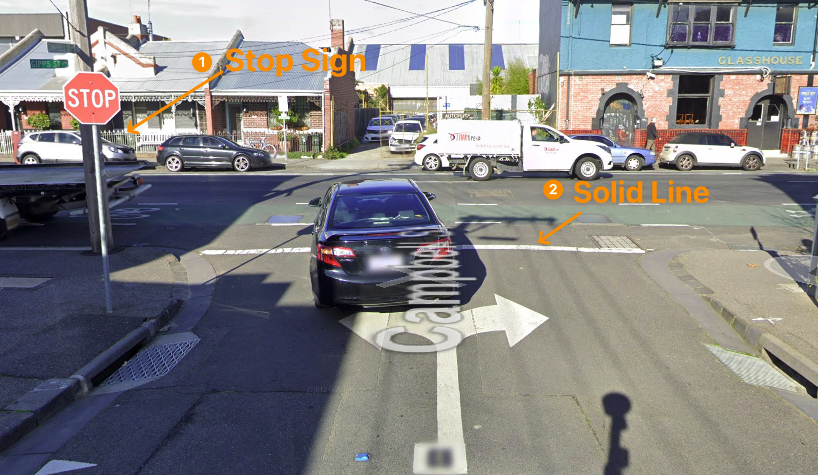
Stop means you should fully stop in front of the solid line. We advise you to stop at least 3 seconds during the test to check the incoming vehicles and surroundings. Do a head check and surrounding checks before you move again.
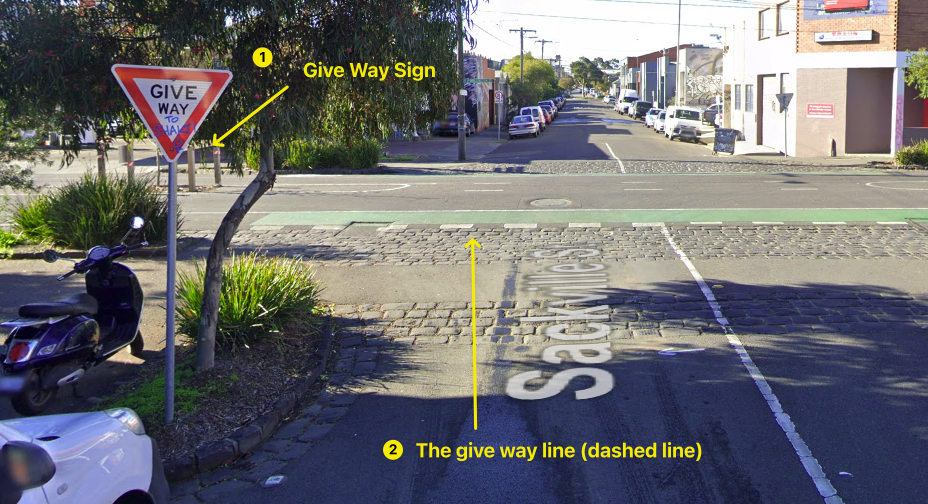
Give way means you must give way to pedestrians and vehicles against you moving. It usually comes with a dashed line. Sometimes, there is no sign but a dashed line; you must also give way to others.
-
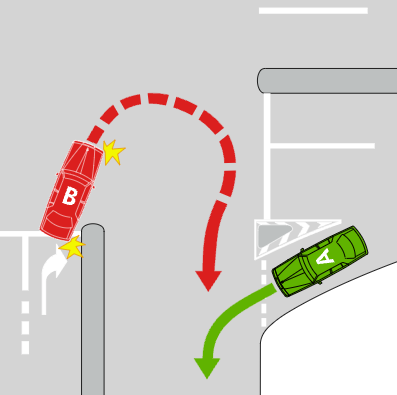
At uncontrolled intersections, give way to vehicles already in the intersection and vehicles approaching from your right
-
Turning right across oncoming traffic, give way to oncoming vehicles going straight or turning left
-
At a T-intersection, traffic on the terminating road gives way to all traffic on the continuing road
-
In Victoria, U-turns must give way to all other vehicles, including those turning left from a slip lane. See this link for more details.
Speed Management
Maintaining the appropriate speed is critical to passing your driving test. Here are the key requirements:
-
Do not exceed the speed limit by any margin for a continuous period of 5 seconds or more.
-
Do not exceed the speed limit by any margin at any time in school zones during the posted operating hours. Even 1 km/h over is an immediate fail.
-
Do not exceed the speed limit by 5 km/h or more at any time during the test. Doing so even momentarily will result in immediate termination.
-
When driving straight, travel at or close to the speed limit when conditions are suitable. However, you must drive at a lower speed if road or traffic conditions (e.g. wet roads, unsealed roads, heavy traffic, etc.) make it unsafe to travel at the limit.
-
When driving straight, do not drive 10 km/h or more below the speed limit, unless road or traffic conditions make it unsafe to drive closer to the limit. Impeding the flow of traffic will count against you.
-
When merging, adjust your speed as necessary to safely merge into a gap in the traffic.
Note that advisory speed signs (normally on a yellow background) are recommendations, not legal limits. You are not required to strictly obey them if weather, road and vehicle conditions allow you to safely exceed the advised speed.
Turning
-
Signal for at least 3 sec before turning
-
Slow down smoothly & prepare to stop if needed
-
Check mirrors & blind spots for vehicles, pedestrians, cyclists
-
Keep both hands on the wheel during the turn
-
Turn from and into the correct lane
-
When turning right, keep left of the center line before and after the turn
-
When turning left, stay within your lane and don't cross the center line
-
Choose a safe gap in traffic and complete the turn promptly
Common turning instructions:
-
"At the next street, turn left (right)."
-
"At the traffic lights, turn left (right)."
-
"At the roundabout, turn left (right)."
When turning, the testing officer will observe your approach speed, signalling, observation, gap selection, lane positioning and completion speed. Aim for smooth, steady and safe.
Changing Lanes
-
Check center mirror and side mirror in the direction of the lane change
-
Signal for 3+ seconds
-
Head check to blind spot
-
When safe, change lanes promptly and completely
-
Cancel the signal and adjust the speed to the traffic flow
The testing officer may ask you to change lanes in preparation for a turn. For example: "At the traffic lights, turn left into the left (middle/right) lane." "When safe, move to the left (right) lane." "When safe, move to the left lane and continue straight."
Stop Sign
The stop sign is important during the test. We mentioned the right of way previously, and here are some details you need to know during the test:
-
Stop completely for 3 seconds at the line to check safety. If you waited behind other vehicles, the waiting time doesn't count for these 3 seconds.
-
Observe traffic and proceed only when safe. If there is no safe gap, waiting longer and being patient is okay.
-
When you decide to move, please make a head check for bikes and pedestrians.
-
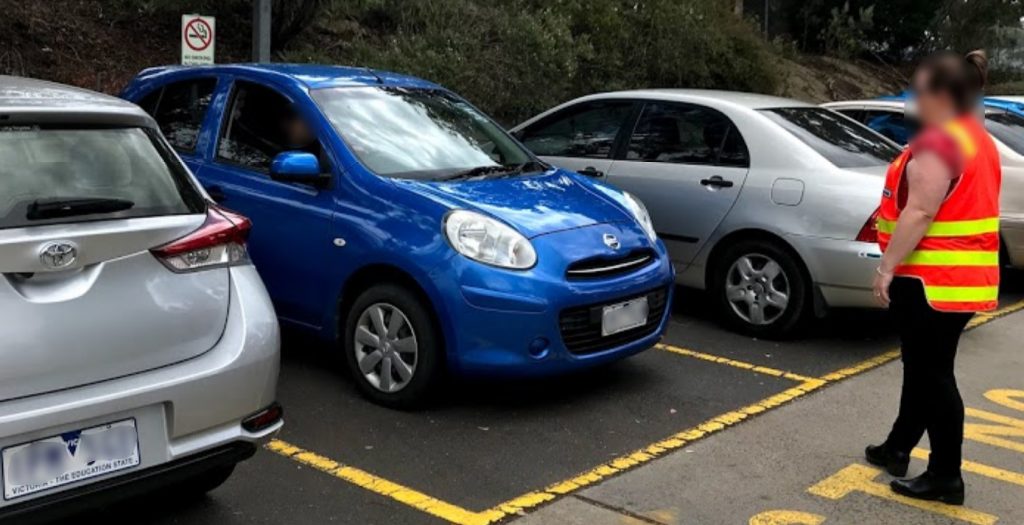
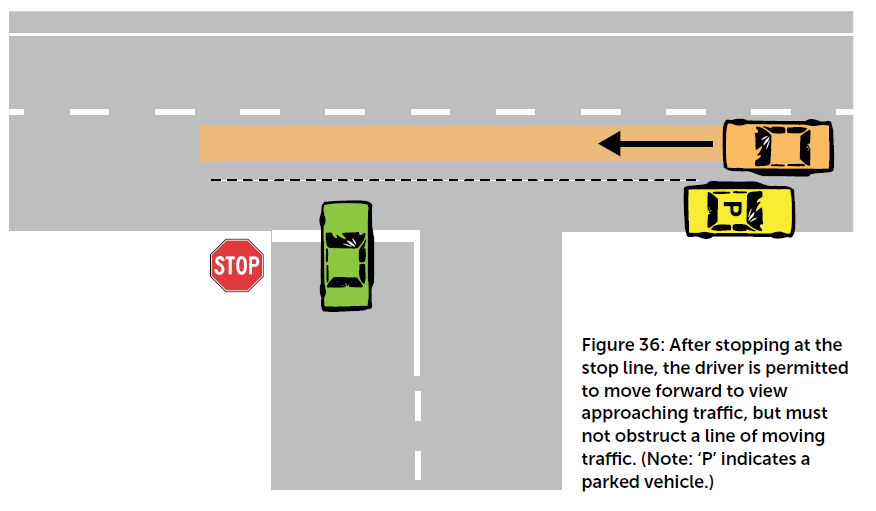
See picture below. When parking vehicles or something else is blocking your sight, moving forward to check the incoming vehicles is fine.
Roundabouts
-
Only signal left or right on approach if turning, not when going straight
-
Always give way to vehicles already on the roundabout
-
If turning left, signal left on approach and stay in the left lane
-
If turning right, signal right on approach and stay in the right lane
-
When exiting, signal left if practical (usually only on larger roundabouts)
Bicycle Lanes and Bus Lanes
-
Do not drive in bicycle lanes and bus lanes except when entering or leaving the road or turning
-
You may travel up to 50m in these lanes when necessary for these maneuvers. For example, you need to turn left at the intersection, and there is only a bus lane instead of a left-turn lane.
-
Always check your mirrors and blind spots for cyclists before crossing a bicycle lane
Courts and Cul-de-Sacs
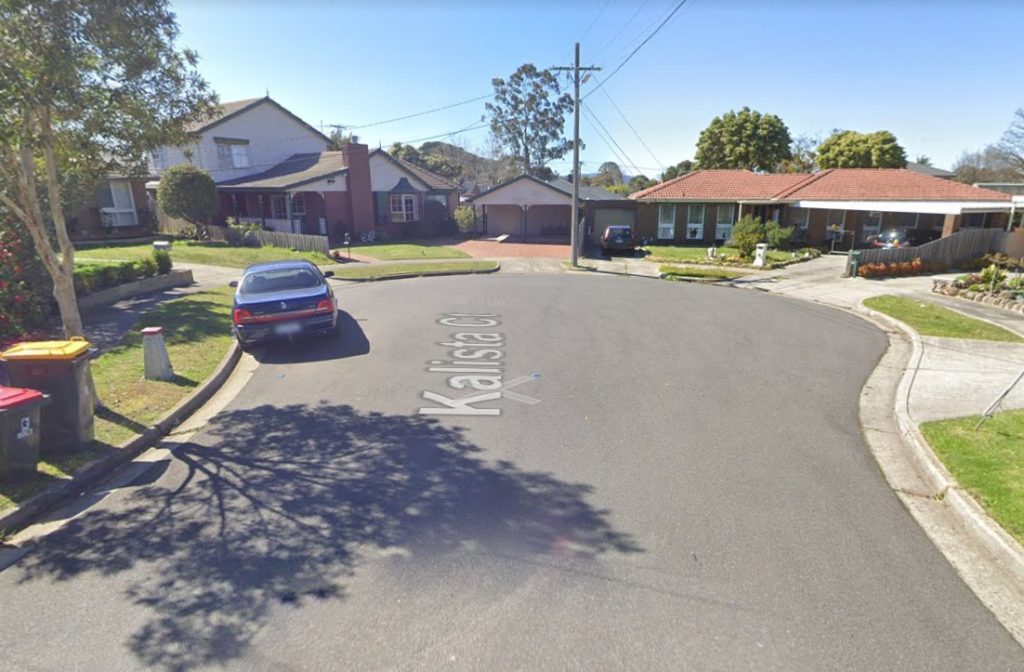
If your test route includes a court or cul-de-sac, you'll need to drive in, perform a turn, and exit. When turning in a court:
-
Indicate left before entering
-
Switch to a right signal as you turn right around the circle
-
Turn off the signal as you exit
-
Keep left when driving
Reverse Parallel Parking or 3-Point Turn
This testing part is very important in Stage 1. Your officer will select one of these maneuvers based on road conditions. 3-point turns are more common because it is often hard to find a perfect spot to perform parallel parking for the drive test. Refer to the guides on AuDrive for step-by-step instructions and reference points to nail these every time.
The key with both is smooth, controlled movements and continuous observation. You can touch the curb during parallel parking, just don't roll over or hit it hard. Please check the tutorials by NZ Transport:
Pulling Over and Stopping
At the end of Stage 1, the testing officer will ask you to pull over and stop so they can assess your performance before proceeding to Stage 2. When pulling over:
-
Indicate and slowly approach the curb
-
Pull over and stop close and parallel to the curb (about 30cm)
-
Select park gear and apply the parking brake
-
Keep your seatbelt fastened
This is where the testing officer reviews your Stage 1 performance. If everything is satisfactory, you move on to Stage 2.
Other Tips
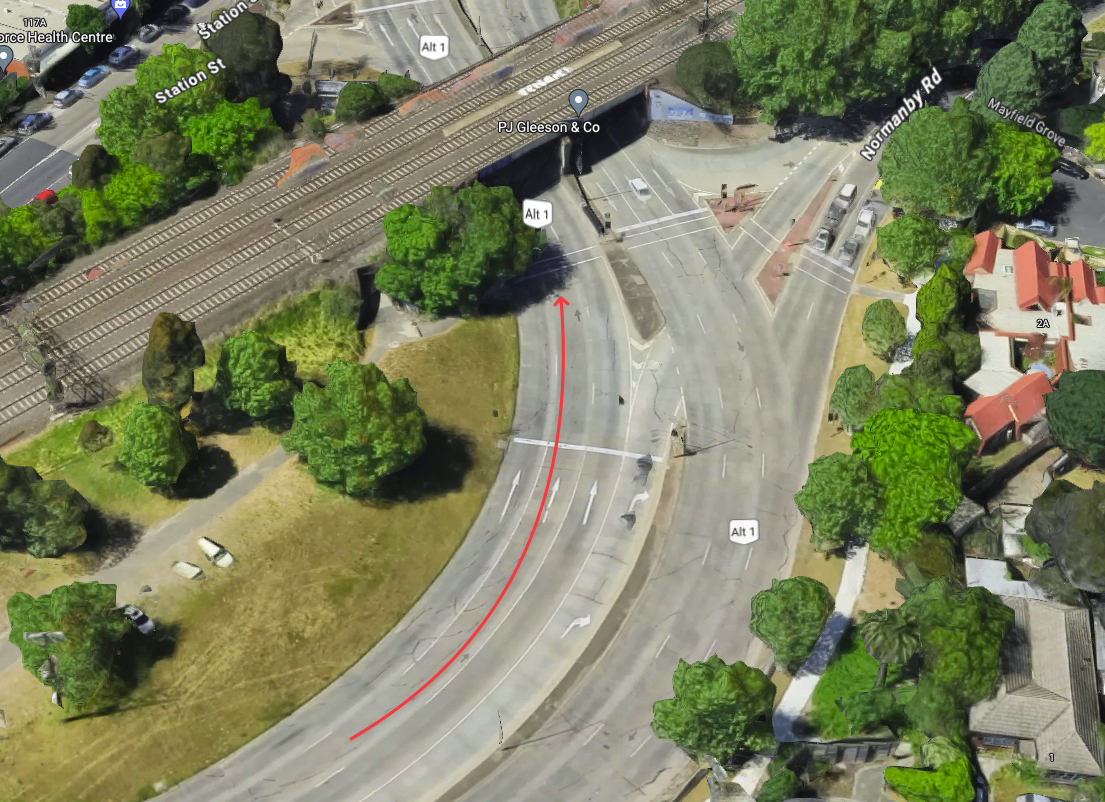
- You don't need to indicate when the road is becoming curved (you are still going straight). For example, you don't need to signal "left turn" when going straight like the following image.
-
Brake smoothly and gradually, never abruptly unless necessary
-
When passing through intersections, be prepared to speed down and check other traffic.
-
The head check should be complete. Do really check the blind point and make the officer convinced.
Stage 2 - Busy Traffic
Stage 2 moves to 60-80 km/h main roads to assess your daily driving abilities. A few focus areas:
Speed Management
-
Maintain 75 km/h in 80 zones
-
Maintain 55 km/h in 60 zones
Lane Changes
-
Check the center mirror every few seconds
-
Signal for 3 sec & head check before moving
-
Change promptly when safe, matching traffic speed
-
Cancel the signal after completing the lane change
Left Turns
Left turns are generally simpler but still catch people out:
- Check mirrors and signal at least 3 seconds before the turn
- Head check left for cyclists before crossing a bike lane. This is the most common left-turn fail reason.
- Position in the left lane well before the intersection
- Turn into the nearest (leftmost) lane
- Watch for pedestrians crossing the road you're turning into. Give way to them.
- Maintain a slow, controlled speed through the turn
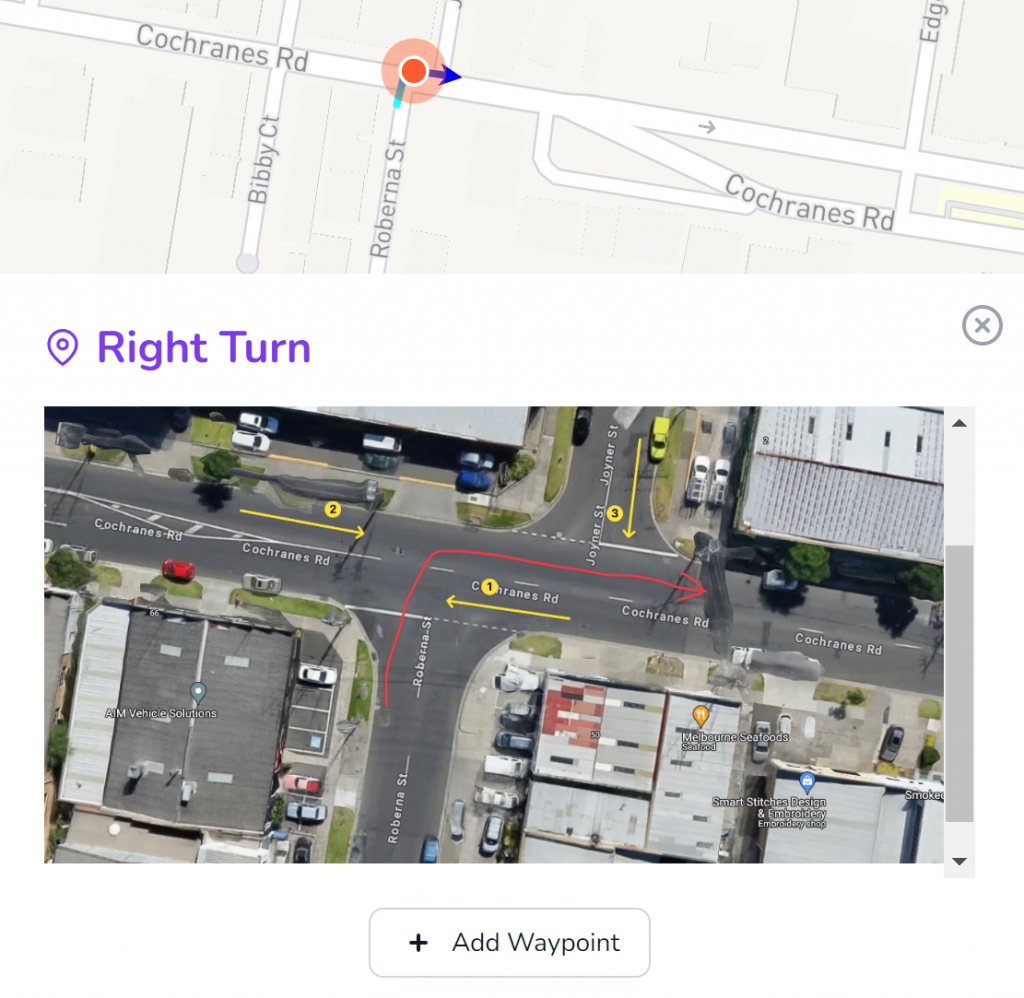
Right Turns
Right turns involve the most conflict points and are where many candidates accumulate errors.
With a green arrow: Wait in the right-turn lane. Proceed when the arrow shows. Still check for pedestrians crossing the road you're turning into.
Without a green arrow (filter turn): Pull into the intersection and wait for a safe gap in oncoming traffic. If the light turns red while you're waiting in the intersection, complete your turn once oncoming traffic stops. Don't block the intersection by entering it when there's no space to complete the turn.
Multiple right-turn lanes: Stay in your lane throughout the turn. Don't drift across into the adjacent turning lane.
Uncontrolled (no signals): Give way to all oncoming traffic going straight or turning left. Wait patiently for a clear gap. If unsure, waiting longer is always better than forcing it.
Into side streets: Signal right, check mirrors, slow down, and give way to oncoming traffic and pedestrians. Head check right before committing to the turn.
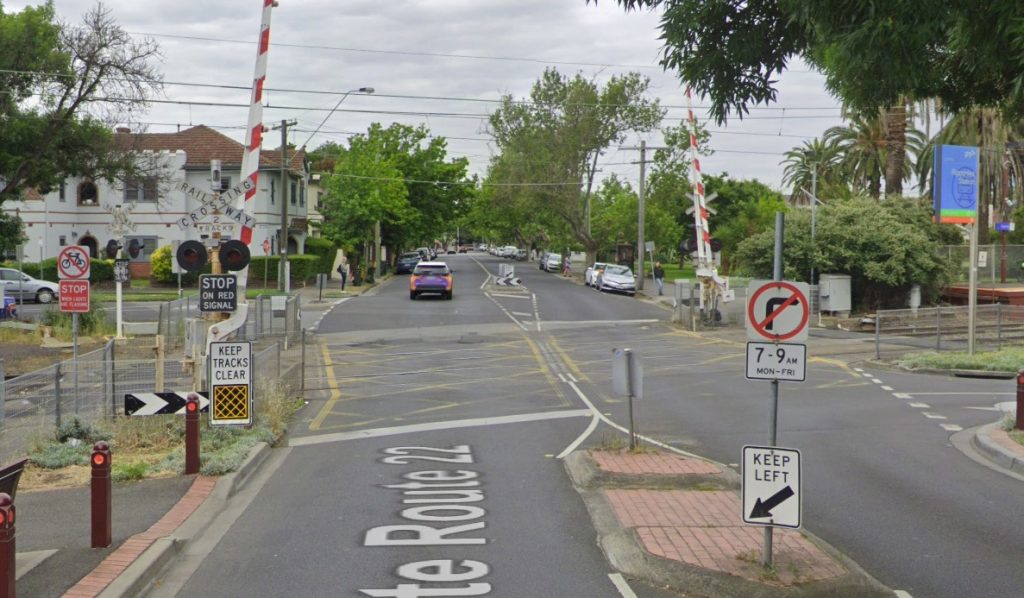
Railway Crossings
Victoria has many railway crossings protected by signs, flashing lights, boom gates or a combination. You must always approach them prepared to stop and only proceed when the warnings have ceased and the tracks are clear. Fail to stop at a railway crossing when required and your test ends immediately.
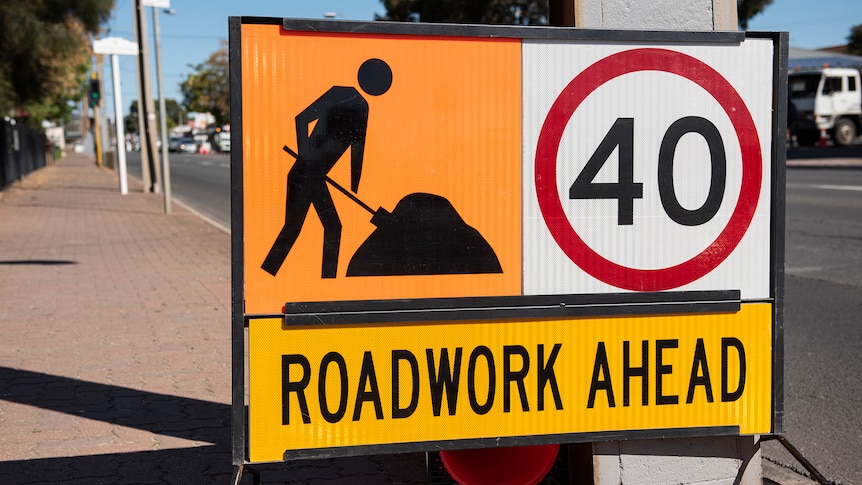
Other Situations
Construction zones and school times may have reduced 40 km/h limits. Slow down before the signs, and don't speed up until after the next posted limit sign. Let impatient drivers pass on the right.
If you encounter an accident, stay calm, slow down, and follow officer instructions. These won't negatively impact your test.
How to Practice
Practise on real test routes near your VicRoads centre: Heatherton, Frankston, Bundoora, or browse all VIC centres. Drive them regularly, focusing on the key skills for each stage.
You can easily find the notes of tricky locations around the testing center. The platform also supports creating custom practice routes by connecting these locations to a Google map or Apple map navigation.

You can also check out the real testing routes reported by others. Check the "Mock Test" now at AuDrive.
Immediate Termination
Certain dangerous errors result in immediate test termination, including but not limited to:
-
Speeding by any amount in school zones
-
Excessive speeding of 5 km/h or more
-
Disobeying a stop sign, red light, or railway crossing signal
-
Causing another driver to take evasive action
-
Collision with a vehicle, object, pedestrian or cyclist
-
Mounting the kerb or driving off-road
-
Intervention by the testing officer to avoid a hazard
While a couple minor errors are permitted, repeatedly making the same mistake or totaling too many errors in one stage will also lead to a fail. The test is designed to ensure you demonstrate consistent, safe driving behaviors before progressing to your probationary license.
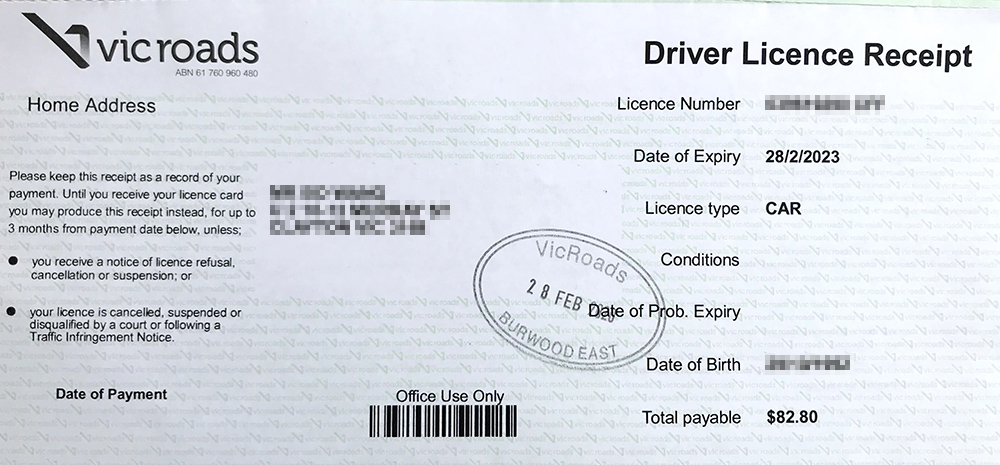
After You Pass
Celebrate! Your officer will take you inside to process your license paperwork. You'll get a temporary receipt to use until your official card arrives in the mail, usually within 2 weeks.
If you received a probationary license, remember to display your P plates (available at Kmart and other retailers). Drive safe out there!
For test centre comparisons and pass rate data, check out our Melbourne test centre guide.
Before test day, make sure you have everything ready with our driving test checklist. If you're converting from an overseas licence, check the specific requirements in our overseas licence conversion guide.
FAQ
What are the critical errors on a VIC driving test? Critical errors that end the test immediately include speeding by 5 km/h or more, any amount of speeding in a school zone, disobeying a stop sign or red light, causing another driver to take evasive action, any collision, mounting the kerb, and examiner intervention to avoid a hazard.
What are the car requirements for a driving test in Victoria? Your vehicle must be clean, registered, and roadworthy. It needs a functional speedometer visible from the passenger seat, working mirrors on both sides, operational demisters, seatbelts for all occupants, working headlights, an accessible handbrake for the testing officer, and L plates displayed. Compact cars like the Nissan Micra are popular choices because they have large, easily visible speedometers.
How slow can you drive under the speed limit in VIC? You must not drive 10 km/h or more below the posted speed limit unless road or traffic conditions make it unsafe to drive closer to the limit. Driving too slowly counts against you for impeding the flow of traffic. A good target is 5 km/h below the limit in zones where you feel comfortable.
How do you do a 3-point turn for VicRoads? The testing officer will ask you to perform a 3-point turn on a quiet residential street. Use smooth, controlled movements and maintain continuous observation. Signal right before turning, check mirrors and both blind spots at each stage of the turn, and make sure you don't mount the kerb. Keeping your speed low and your movements deliberate is the key to passing this part.
What is the pass rate for the VIC driving test? Victoria's pass rate across all candidates is 72.2% (492,504 tests, DTP FOI CS019502). Per-centre figures for the whole testing population do not exist publicly, and VicRoads refused that part of our FOI request on the basis that the data cannot be extracted from its systems; the centre rankings you see quoted come from one driving school's own students. Choosing the right time and location may still help; see our guide on the best time to book your driving test.
How long is the VIC driving test? The VicRoads drive test takes about 30 to 40 minutes and is split into two stages. Stage 1 covers low-risk tasks in quieter traffic, and Stage 2 tests daily driving skills in busier conditions. You must pass Stage 1 to proceed to Stage 2.